Table of Contents
Welcome to the Passionart Resinzwood world of Dirty Pour Resin Tutorials. Within this section,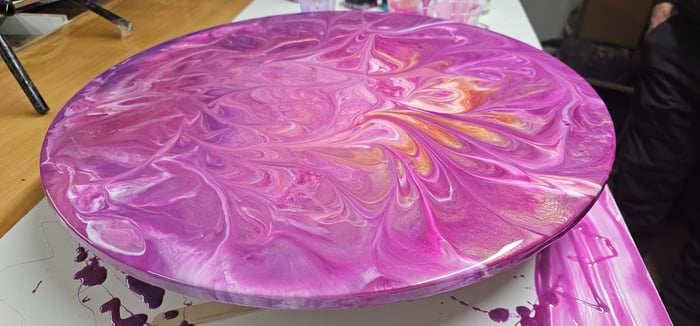 you will learn the very satisfying art of doing pours that can be achieved in many ways by crafting unique effects. With our Dirty Pour Resin Tutorials, we will look at the different types of pours using multiple mediums, including oils, isopropyl alcohol, spray paint, and silicone base products, along with varying utensils of the household. With any art, we are only limited by imagination, so let's get a bit funky and crazy😲 crafting the beautiful and ugly pours. Some pours come out ugly to our eyes but are excellent to others. However, if we are not satisfied, we sand the board and try again over the top.
Basic Tools for Dirty Pours
When it comes to doing dirty pours for the first time, there are a few basics that we want to have on hand so we can efficiently utilize these tools and materials to craft what we think will be a show-stopping piece of art.
- Purchase our Circular Resin Art Board of 10 mm thick MDF, or we can custom cut boards to your preferred size. Alternatively, you can use a canvas board with sufficient backing to support the weight of the resin.
- Buy our Passionart Art Tape to create a dam around your artboard's edge.
- Buy our Passionart Infrared Temp Gun for resin so you can monitor the temp of the resin
- Buy - Percission Scales Resinzwood
- Variable heat, Heat gun for blowing out waves and effects
- Gas torch for heating resin and dispersing bubbles
- Small plastic or cardboard cups for mixing and pouring resin
- Large plastic containers for layering your colours into
- White vinegar to clean any resin off your hands as it does a great job and nontoxic
- Ice block sticks for mixing small amounts of resin
- Small level to get your boards even and flat
- Rubber gloves for your hands
- Use an Apron to protect your clothes
- A warm work area above 23c is ideal
Best Resins and Base Pastes
- Passionart 1:1 Art Resin is the best in NZ
- Colour passion colours
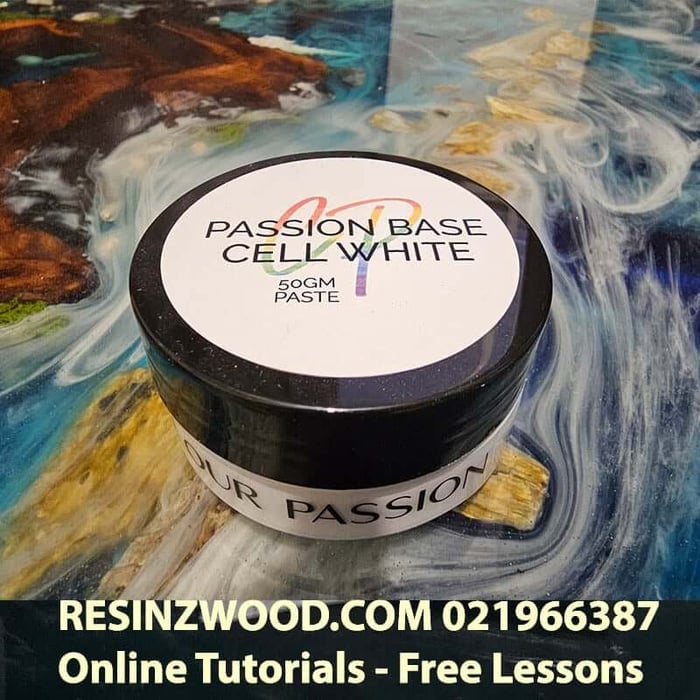
- Colour Passion Base Cell white for effects
- Colour Passion Top Cell white for creating perfect waves
- Black Passion for base effects
Basic Method for Dirty Pours
- Place your stand for the board on your bench
- Run tape around the outside edge of the board to create a rim 8mm high
- Place the board on your stand and ensure it is level
- Calculate how much resin you need - Resin Calculator
- Mix your resin by adding the hardener first, then the resin to the mixing container
- Divide your resin into smaller cups for your colours
- Pour your colours in layers into your pouring container
- Pour your resin over your board in the style/effect you desire
- Gas torch of heat gun the resin for effect
- Wait till resin starts to cure, then remove the tape to allow for runoff over the sides of the artboard
- Smooth off runs on sides with your hands
- Scrape or cut off excess run-off resin with the back of a craft knife
- Leave to cure fully
- You may wish to lightly sand and then do a final flood coat over your artwork
- Now you have created a Masterpiece Dirty Pour
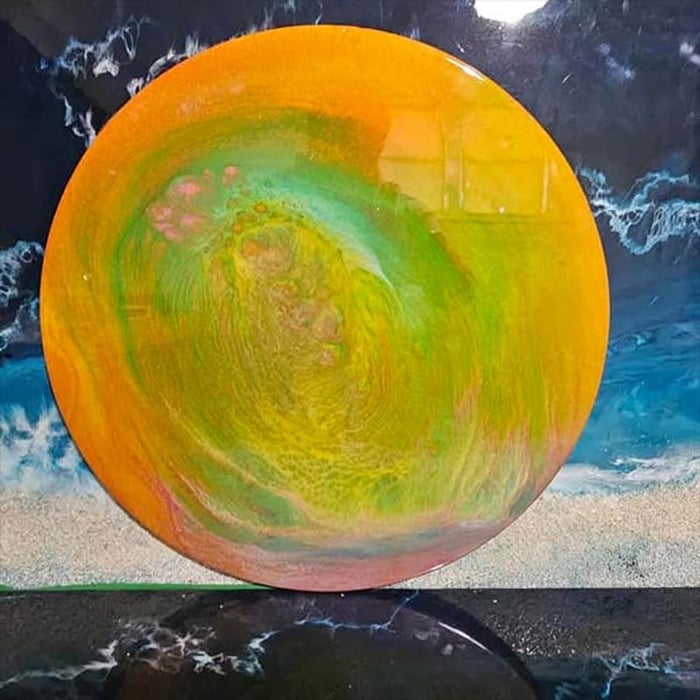
Now that you have the basics, let's get down to crafting stunning boards for Wall Art, Serving Platters, and Clocks.